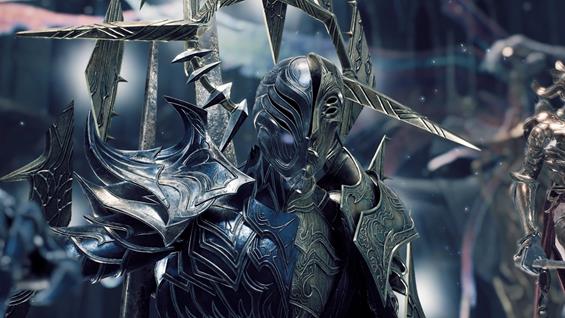
Malefic Gallery |
|---|
 |
|
The Counterpart of the Beatific Gallery, from here Faerin governs his world |
Malefic Gallery is a Location in Remnant 2. Malefic Gallery is home of Faerin, the one who acts as ruler of this world. Each Location in Remnant 2 will feature unique landscapes, events, dungeons, Bosses, Enemies, and Items.
Remnant 2 Malefic Gallery Lore and Information
The Counterpart of the Beatific Gallery, from here Faerin governs his world
Remnant 2 Malefic Gallery NPCs
NPCs in Malefic Gallery are as follows:
Remnant 2 Malefic Gallery Merchants
Merchants in Malefic Gallery are as follows:
- There are no Merchants in this area
Remnant 2 Malefic Gallery Items
Items in Malefic Gallery are as follows:
Equipment
Quest Items
Materials
Remnant 2 Malefic Gallery Enemies
Enemies in Malefic Gallery are as follows:
- There are no Enemies in this area.
Remnant 2 Malefic Gallery Bosses
Bosses in Malefic Gallery are as follows:
Remnant 2 Malefic Gallery Walkthrough
Activate the checkpoint as soon as you enter the area.
You will find Faerin beyond the area, and he will interact with you. There are a few options about how to approach the conversation with him. You can ask him about Clementine, but he will assure you that she is not in his world. Even though he believes your quest has ended in failure, he also finds a use for you. He tells you about Faelin, who he believes is his imposter and can be found in the Golden Halls. If you kill Faelin, and return to the Malefic Gallery, he will reward you with Faerin's Sigil.
If you intend to kill both of them, you will notice that is not possible. Once you kill one and return to the other one for the reward, you will find out that you can't start a fight with him.
The other option is to simply fight him.
Boss Battle: Faerin
Faerin is a hulking figure, that uses both melee and ranged attacks. He also may perform a dash to quickly close the distance, but most of the time he walks slowly towards you.
His weakspot is his head, in which damage will be increased, try to heat him there as much as possible.
Note that he can also teleport around the map to evade your attacks. When half his health bar is removed, he will enter his second phase, in which he summons two energy balls at either side. He also elevates all the giant Swords from the statues on the battlefield and slams them to the ground.
During this phase, Faerin will move much faster, almost as if sliding, and be much more aggressive with his attacks. He can summon energy balls that will attack you as if they were turrets. You can destroy them by attacking them.
When you remove 75% of his health bar, Faerin enters his third phase. He will teleport around the battlefield, attempting to attack you from behind with his sword. Also, giant swords will drop from the sky attempting to damage you. Move around as much as possible. At this point, Faerin will move incredibly fast, and will keep teleporting to avoid damage and to surprise you with one of his attacks.
Defeat him to earn:
- Lumenite Crystal x6
- Scrap 1,035
- Tome of Knowledge
- x1 Melded Hilt
- Strange Object

Remnant 2 Malefic Gallery Gallery, and Notes
- Other Notes for the Malefic Gallery go here
- By fighting and defeating Faerin, you will earn the Traitor Achievement/Trophy.
- Also, if he is the first world boss you defeat, you will earn Quest for Survival.

If you want Faerin's Sigil, you actually have to go kill Faelin (in Beatific Palace).
1
+10
-1