Proving Grounds |
|---|
| |
|
An ancient area used as a rite of passage and growth |
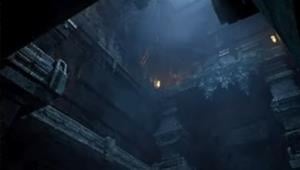
Proving Grounds is a Location in Remnant 2. Proving Grounds is an ancient area used as a rite of passage and growth, and one of the many worlds that can be explored in Remnant 2. Each Location in Remnant 2 will feature unique landscapes, events, dungeons, Bosses, Enemies, and Items.
Remnant 2 Proving Grounds Items
Items in Proving Grounds are as follows:
- Ceramic Flask
- Dark Sea Armada Crest
- Floodlit Diamond
- Battle Set
- Gladiator (dropped by boss)
Remnant 2 Proving Grounds Enemies
Enemies in Proving Grounds are as follows:
__enemies__
Remnant 2 Proving Grounds Bosses
Bosses in Proving Grounds are as follows:
Events and Secret Passages in Remnant 2 Proving Grounds
Events and Secret Passages in Proving Grounds are the following:
* Random injectable
Remnant 2 Proving Grounds Walkthrough
Players will have to navigate the area to reach the two levers, that allows them to lower the water. This will lead to the Ceramic Flask.
Remnant 2 Proving Grounds Gallery, and Notes
- Other Notes for the Proving Grounds go here
 Anonymous
Recommend using movement speed items and bloodless heart to get through this man made hell

 Anonymous
 Anonymous
TL:DR: Awful area, one hit deaths, die, die, die a lot for mediocre items that'll barely contribute to most builds. Only do this area unless you are a completionism, or haven't suffered enough PTSD from the last time they did an area like this.
--------
They couldn't help but create another rage inducing area. Once again you're faced with one hit kill traps while requiring to stand on buttons to generously timed opened doors while hoping a trap doesn't so much as graze you to death. Now it's been added with the Pot monsters Artillery and ranged attacks distracting you even more so.
You'll quickly run out of patience here and will constantly have to flip between a movement speed build and a combat build as after completing most of the traps you'll be trusted into fighting a few monsters there to catch you off guard.
My recommendation is unless you are desperate for the items, or really want to play Remnants 2's discount Getting Over It With scenario. I would come back to this area on an easy difficulty so the mobs are less annoying and ensure you read a guide to get ALL of the items first time round so you don't have to put up with an awful zone once more. Because you will die, and die and die until you either figure out the patterns through trial and error, or watch a guide video hoping you can mimic the path.
The only decent object remotely worth in this area is the Ceramic Jar right at the end to unlock a weapon mod. Of course it would be the very last thing to get. The rest is not worth stressing over unless you have a specific VERY specific build in mind for it.
 Anonymous
Instead of immediately trying to get the secret rewards, it's better to first do the puzzles as intended and afterwards do them all over again but with the traps deactivated

 Anonymous
There is a secret on the 4th floor with the Dark Sea Armada Ring. You have to trigger the pressure plate but take the reset path on right at the end of the room. There will be a timed door on that path.

 Anonymous
What an area. Almost every single trapped room has an additional secret:
Battle Armor Set in the first room after draining water
Floodlit Diamond in the second room by jumping into an invisible wall off of the first rising pillar
An abberation the drops the Gladiator mutator off of the third trap room - stand on the center pressure plate and backtrack through a new passage on the right
Nothing (that I know of) off the 4th trap room
Dark Sea Armada Crest off the final room. Open the final door as usual but instead of exiting take the safe backtrack passage at the end of the room. On the same timer as the normal exit door.
 Anonymous
All this jumping around for a weapon mod and mediocre armor set? What a disappointment.

 Anonymous
At the bottom of the first trap room, there is the Battle Armor Set

 Anonymous
 Anonymous
this place is awful, I was stumped for so long on the 2nd trap room


I suggest using, cat ring and challenger for 2 death avoidance chances and invader with the second skill, the one that dash you forward. Also, don't worry about getting all items in your first try. Complete the zone, then withouth resting, go back and go throught evrything but without any trap.
2
+10
-1