Sentinel's Keep |
|---|
 |
|
"You have arrived in the Core." |
Sentinel's Keep is a Location in Remnant 2. Sentinel's Keep is the Tower where the Core is located, the same core The Custodian needs to access in order to save N'Erud and the Drzyr. Each Location in Remnant 2 will feature unique landscapes, events, dungeons, Bosses, Enemies, and Items.
Remnant 2 Sentinel's Keep Lore and Information
Sentinel's Keep is where the Core is located, searched by The Custodian. And can only be accessed by first finding all Seeker's Keys.
Remnant 2 Sentinel's Keep NPCs
NPCs in Sentinel's Keep are as follows:
- The Custodian (Talks to you even though it's not physically present)
Remnant 2 Sentinel's Keep Merchants
Merchants in Sentinel's Keep are as follows:
- None
Remnant 2 Sentinel's Keep Items
Items in Sentinel's Keep are as follows:
- Eidolon Shard (Obtained as reward for defeating Sha'Hala: Spectral Guardian of N'Erud)
- Segment (Sentinel's Keep) (Obtained as reward for defeating Sha'Hala: Spectral Guardian of N'Erud)
- Power Saver (The ring is up the stairs on your left, after you enter the keep, before taking the elevator to Sha'hala)
Remnant 2 Sentinel's Keep Enemies
Enemies in Sentinel's Keep are as follows:
- None
Remnant 2 Sentinel's Keep Bosses
Bosses in Sentinel's Keep are as follows:
Remnant 2 Sentinel's Keep Walkthrough
Sentinel's Keep can be accessed by gathering all Seeker's Keys and using them at the gate near the Threshold of the Unknown waypoint at the Phantom Wasteland in N'Erud. You may be able to see it from a distance as it's a very tall mountain with a big white shiny sphere on top.
Sha'Hala: Spectral Guardian of N'Erud
Once you enter you will find a big hall with not much to interact with except an elevator at the center, climb up. You'll hear The Custodian talking to you while the elevator is ascending. Once you arrive to the top, The Custodian says you arrived to the Core, and then he asks you to use the console to shut it down, so he can gain access and save N'Erud.
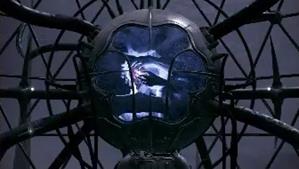
While doing so, a giant creature will come out of the big sphere in front of the console in a cinematic scene. Defeat Sha'Hala: Spectral Guardian of N'Erud.
Once defeated, you'll be rewarded with a Eidolon Shard and a Segment.
You may return to The Custodian to receive an Embrace of Sha'Hala as Reward for completing his quest.
Remnant 2 Sentinel's Keep Gallery, and Notes
- Other Notes for the Sentinel's Keep go here
 Anonymous
 Anonymous
 Anonymous
What is the keys name? I'd like to find it for the second boss option.

 Anonymous
So when I use the code sole it asks for an item I do not have and I've looked everywhere

 Anonymous
This boss has two versions. One if you use an key in the console, where you fight him, and one that you don't use the key.
When you have the key, the reward is the item to make the gun.
When you dont have the key the reward is the item for the katana.
 Anonymous
There was a second interaction point on the console that triggers the Use Item interface. I didn't have the key item so can't speak on what using it would do.


"Power Saver" ring direcly infront of you before you go up elivator, go up left stairs and look right
3
+11
-1