Consort's Puzzle |
|
|---|---|
 |
|
| Location | The Lament |
| Reward | Blood Tinged Ring |
Consort's Puzzle is an Event in Remnant 2. Consort's Puzzle s a puzzle present in The Lament, it rewards the Blood Tinged Ring and leads you to the fight with Wither. Events are situations where a player can obtain special Items like Weapons or Consumables for solving a puzzle or finding a secret area. These events may or may not appear during your play through, requiring a restart or an adventure mode play for a chance of getting them. All Events are bound to their corresponding Locations.
Remnant 2 Consort's Puzzle Walkthrough


Where to Find Consort's Puzzle in Remnant 2
Consort's Puzzle can be found in the following Locations:
Consort's Puzzle in Remnant 2 Rewards
Consort's Puzzle Notes & Trivia Remnant 2
- Note that which symbol corresponds to which name is randomized, so pay attention mostly to the painted symbol on the coffins.
- Lore and other trivia go here.
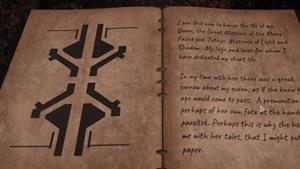
Every Corpse have different color, it matches with the Symbol in the book (1.Page).
Write down the Symbols. Enter it, order should not matter.
That's how i solved it.
 Anonymous
The symbols you have to input aren't based on the symbol's shape (the one in the book) but rather the color of the symbol. The order does not matter.

 Anonymous
1. open first page of book not symbol and color
2. For every corpse with a blanket matching said symbol, memorize or screenshot the glowing symbol above. should be 4. order doesnt matter
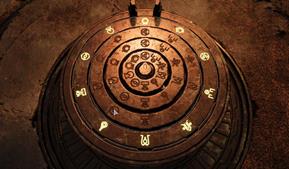
3. put thos 4 symbols into dial above.
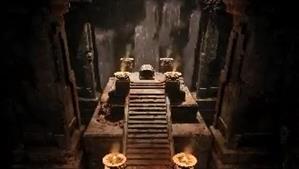
You have to wal through the entire level to ge tback up onto the balcony with the dial. so make sure you note the symbols below the dials platform as soon as you come across them to avoid backtracking.
This is by far the lamest, most akward and mood killing puzzle ive found so far. The book completly misleads you and is ridiculously long. Theres no reason to make the player walk all the way back around by hiding some of the corpes directly below the dial balcony unseen from above. Nothing about this is fun or clever.
 Anonymous
The Order of the four Symbols does NOT matter,
I tried it twice and the chances of me getting the order right in two worlds is miniscule
 Anonymous
I just entered all 4 symbols from the corpses with the gray covers and it worked

 Anonymous
Oh i was suppposed to do it by the book? I tryed go by colour or visible horns and then i saw that 4 coffins are fully covered so i tryed theirs symbols at random it worked :D guess i was lucky

 Anonymous
Does the book not spawn if you've already completed this puzzle before?

 Anonymous
You just need the symbols find above the coffin (with the patern found in the book), but order doesn't matter. No need to read all the poems to solve this enigame.

 Anonymous
There's two of these pages for Consort's Puzzle/Consorts Puzzle

 Anonymous
To expand on the last comment with a bit more instruction for the similarly smoothbrained: the sigil names dont really matter, just look at the symbol on the first page, and then the corpses bearing the symbol and the corresponding sigils above them.
The order to input it is, looking from the entrance then left to right when looking at them: top right row, bottom right row, bottom left row, then just input them outer to inner ring
this took me embarrassingly long to figure out even with both examples, as the corpse positions & sigil names were completely different and probably will be for you too xwx
 Anonymous
IMPORTANT NOTICE:
The last image showing the symbols and listing then 1-10 with names is incorrect.
It would seem the order is randomized.
The symbols that are available are always the same, but which symbol represents what may differ entirely.
Using the above image with symbols 1-10 as a reference for comparison:
Listed above:
Fatebound Hands = 4
Fractured Looking Glass = 5
Bowsplit Wave = 8
Fireforged Snowflake = 2
And then compared to my last playthrough:
Fatebound Hands = 1
Fractured Looking Glass = 3
Bowsplit Wave = 6
Fireforged Snowflake = 10
How to actually solve the puzzle:
Look at the first page of the book. That is the symbol that will be found on four of the cloths covering the graves.
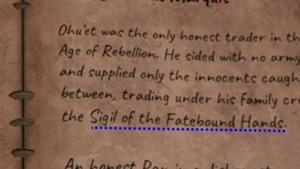
Then look in the book for the order of the sigils (which seems to always be the same)
Then look at the graves, which are aligned according to this:
[_] [_] [1] KEY [_] [_]
[_] [_] [2] [_] [3] [_]
[_] [_] [4] [_]
Find the clothed graves in the locations, then simply read from top left to bottom right in order. I've marked my playthrough of an example of which graves where marked with the correct symbol and then the order to input them into the keystone.
NOTE: The order is the top-middle row of symbols in the keystone incase that is unclear.
 Anonymous

There's a shortcut back upstairs through the door on the far right once you go up the first way once. Confirming it's matching symbols to the first page that change each time. My symbols this play through were dildo, PAIGE NO!, C, and wind.
0
+10
-1