Cursed |
|
|---|---|
 |
|
| Location | The Bloodless Throne |
| Reward | Rally Band Resolute |
Cursed is a Quest in Remnant 2.Cursed is given by the shatter-split form of Lydusa where she will curse the player with a stone touch and demand to retrieve her "precious thing" in exchange for the cure. Quests are the different objectives and missions the player character must achieve to complete the game. Quests move the story forward, lead you from world to world, and make unknown Locations available. Some will also reward special Items or Weapons unique to them.
Remnant 2 Cursed Objectives & Requirements
Cursed objectives are:
- Find the "Precious Thing": Lydusa has cursed me. She says it won't be lifted until I find the "precious thing" that was stolen from her.
Cursed requires the following items:
Remnant 2 Cursed Walkthrough
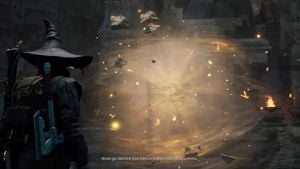
Upon entering, The Ziggurat quest will be marked as completed. In the distance, a tall stone statue in the middle of this area can be seen. Walk towards it and the broken bridge will rebuild itself. As you get closer, a cutscene will begin playing. You will start a conversation with what remains of Lydusa, a shatter-split. She will tell you that she has placed a curse upon you, the touch of Lydusa. She will tell you how the hoofed beasts stole from her, and that she lost her "precious thing". She will ask you to return it to her so she can free you from the curse. The end of this conversation will mark The Ruins as completed and begin the quest Cursed.


Cherished Fracture Location in Remnant 2
Return to Luminous Vale to an area near Walt. Follow the path ahead and proceed to the giant statue in the middle. This will prompt the quest for The Statue. Look at one of the stones nearby and pick up the note which reads:
"The goddess I once knew was kind and demure. What have the Vannt done to make her writhe and lash out in such grief, such terrible torment? If only the king were here to quell her anger. I begged them not to harm him, but they did not listen. They claim they have a means to control her, get in the same breath usher us Gul into hiding. The living stones have gone mad. I only hope that when the goddess descends upon my village, she recognizes who I am and remembers my many offerings and years of devoted worship. What terrible, cruel irony. I dedicated my life to Lydusa, and now I must take shelter from her wrath. We servants did nothing wrong- this horror is the doing of the Vaunnt. If you find this parchment and have not yet sought refuge, there is an inner chamber within this statue, May we all escape this tragedy unharmed."

After that, climb the tower with the root of a tree sprawling around it. You will be jumping 3 ledges here to get to your objective, which is to speak with Private Jack Driver. (See images below)


Upon reaching the home base of a soldier, he will ask you some questions and then he will share his story. He tells you that he's been stuck at Yaesha for over a century and managed to stay alive because of his survival training. He was sent to this place on a recon mission with his squad and was captured by the Pan. He continues by saying that he believes they all died, including Ford, his commanding officer, but he somehow reappeared at the stone they used to travel to Yaesha from Earth, only that they were older.
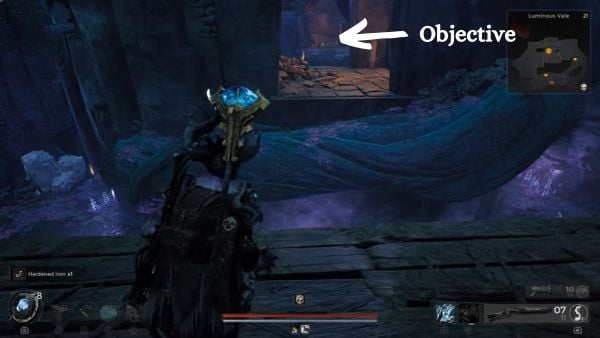

At this point, you can tell him that Ford is alive and he will be happy to hear about this. Later on, he's going to ask you if there's a way home. Then, you can generously offer to take him home with you. Then, he will give you a Rally Band. We haven't tried the other option where you say "If I must" whether he will still give you the ring.

After speaking to Private Jack, exit through the same way you entered but this time, go to the right of the first platform where you will see a wooden bridge. Cross it, then make a left. There's an object blocking your way but you can destroy it with melee attacks or by shooting it. At the end, enter the dungeon to Kaeula's Rest to your right.
Kaeula's Rest
The Kaeula's Rest is a dungeon that will lead into a fight versus Kaeula's Shadow. In the middle of this area, you will see a statue in the middle, stick to the path on your left and exit through the doorway. Eliminate the enemies that you will come across here. When the path splits into two, remain on the left side and walk up the broken steps. This will lead to the Temple Key, which is a quest item. Pick it up from the ground and then walk to the opposite side where you found it, to a tall statue. Look for the door to the left while facing the statue.


Use the Temple Key you picked up to go inside. There are enemies guarding inside this room. Follow the path to the left and go up the stairs. This will lead to a wider area with a broken ceiling. Continue up ahead until you reach this statue. Interact with the purple item on the ground and a short cutscene will begin playing.


Fighting Kaeula's Shadow
The player will be transported to the entrance where they will be fighting Kaeula's Shadow. This boss can summon tentacles from the ground that will shoot upwards. It travels in a quick motion and can be dodged by rolling away from its path. Another attack pattern it will use is a forward strike with one of its tentacles which can leave an opening if it misses.

This boss also has a second form where it will hide underwater and Tentacles will be fighting in her place. She will do this when her health drops to 50% to prolong the fight. After some time, she will reemerge from the water to fight you. Pay attention to the animation as she rises. It's the same with summoning the tentacles and both can deal damage when hit.

After defeating Kaeula's Shadow, a new exit will be revealed behind the arena. There's a door that will lead back into Luminous Vale. Follow the path ahead which leads to a blockage that can be destroyed by shooting. Go through it and the quest The Statue will progress. Inside here, you will find Walt studying a mural as he talks to himself "She's a monster... a foul, wicked beast!" He refuses to talk to you about what he has discovered so you can continue your journey here. Walk back from where you entered, and look for the elevator to go to the lower area.

This will take you to a locked door which you can finally open to lead back into the Statue. Since you have previously removed the blockage from below, you can now pull the lever in front of the statue to reveal an entrance to the inner chamber. Pick up the Cherished Fracture from the altar which is a quest item. Doing this will mark Cursed and The Statue as completed and will start the next quest Return to Lydusa.

Alternate Access to Cherished Fracture
On a different playthrough, the dungeon after the wooden bridge will be changed to the Earthen Coliseum. This area can be accessed by doing the same thing where they will climb up the tower with roots sprawling around it. The bridge behind it will lead to a path going up to the dungeon entrance.
Earthen Coliseum
The area is filled with rubble, overgrown plants, and swarming with enemies. Eliminate the ones who will come your way here as you navigate the path to the right. This will lead to an open area where you will find a mural of the moon's phase with a pond right in front of it. Enter that area where you will solve the puzzle related to the moon's phase.
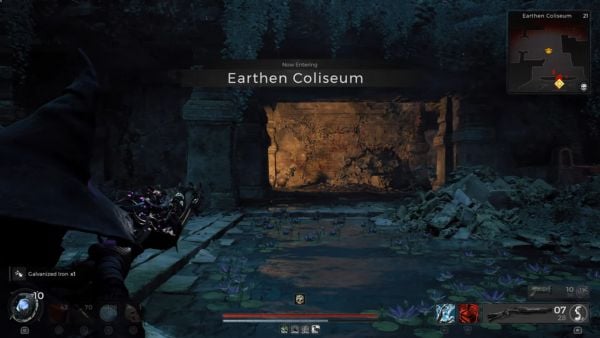
Look at the markings on the wall and you will be connecting them accordingly. We don't know if this will be changed in a different playthrough but the first plate that you will be stepping on is the New Moon, followed by Waning Crescent and so, on. You can look this up or refer to the image of the mural below.
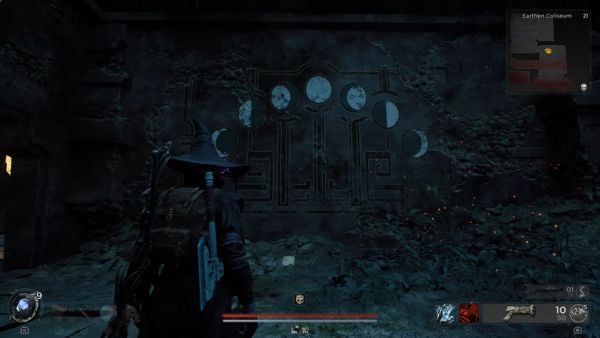
The pattern will look like this from the first plate: ←, ↑, →, ↑, →, ↓, →, and ↓. If you step on the wrong plate, you will fall to the pond below but don't worry, there's a ladder nearby that you can use to go back up.
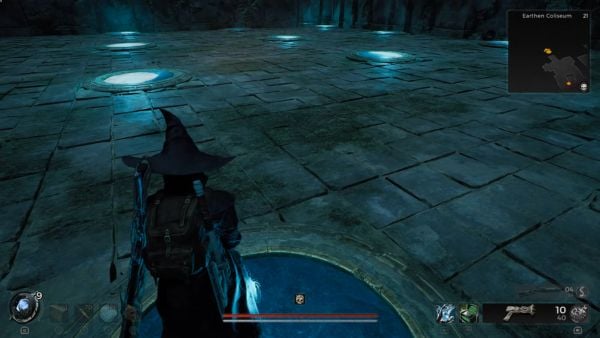
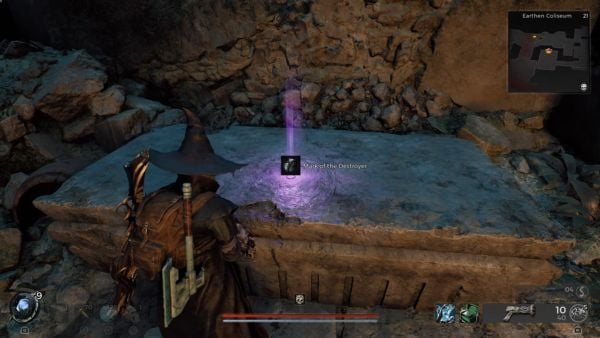
Finishing this puzzle will reward you with a Mark of the Destroyer that you can pick up inside the small room in front of you. After this, go back to the puzzle to do another round. This time, follow this pattern: ←, ↑, ↑, and ←. This will make you intentionally fall into a secret room below it and you can pick up Moon Stone inside.
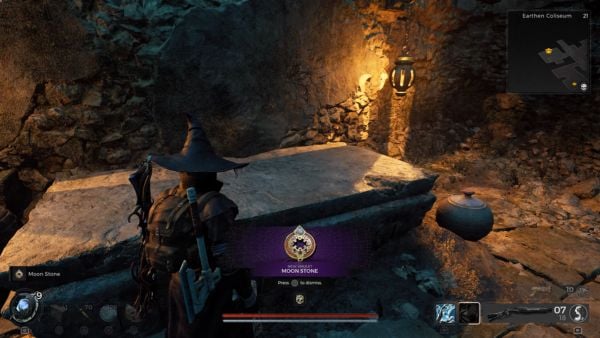
Go back into the mural where you saw the phases of the moon and walk to the left while facing it. This will lead to another section of the dungeon where enemies are swarming. You will find access to the lower levels by navigating the path on your left side with the red carpet lining the steps. More enemies will be on guard here and they will start attacking as you approach the broken steps. You can still pass through the area so continue walking here.
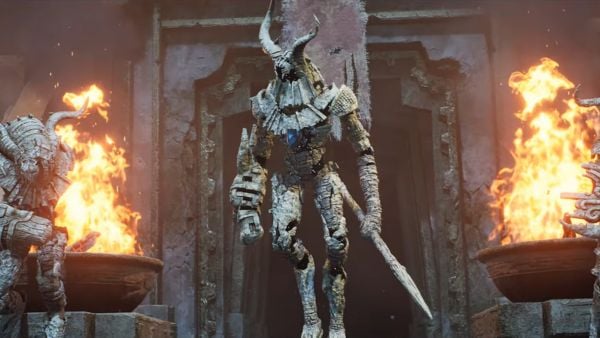
Fight the Stonewarden
Towards the end, you will find a Checkpoint and the white mist indicating a boss fight. You will be fighting The Stonewarden here. This boss is agile and can move quickly in combat like the other stone constructs. It uses a powerful sword that can call on other constructs to attack you. As its health drops, it will create stone constructs like chess pieces and will move across the arena on its command. After defeating it, an exit will be revealed behind the arena.
Go through the door to return to Luminous Vale. This will lead you to an area right on top of the tall statue. Destroy the blockage here and the water will finally pass through. Follow this path and you will find Walt studying another mural. Continue walking here and enter the dungeon to your right which will take you to the Proving Grounds.
Proving Grounds
Activate the checkpoint upon entering the Proving Grounds. Walk towards the middle and pick up the Vestige of Power from a body. Follow the path ahead of you which leads to a waterfall in the distance. Find the stairs to your left to activate another checkpoint here. This is the beginning of the trial where you must cross platforms to reach your objective.
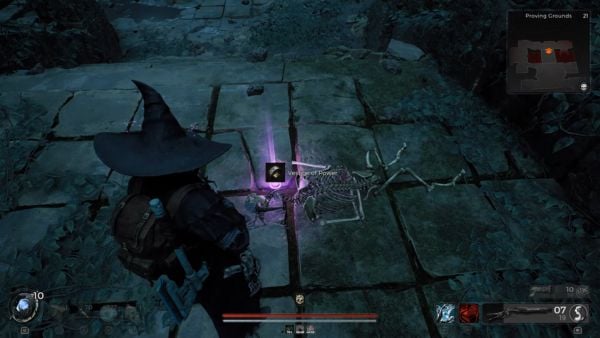
After activating the checkpoint, walk in front, and exit to the left. This is a test of timing and precision where crossing the ledges and avoiding the arrows will decide your fate. If it hits you, you will be petrified and die instantly, and go back to the start. Once you have crossed, you will find a lever and then open the door to your left. Drop down to the area to your left and eliminate the stone constructs here. They will be swarming in so be ready. After this, explore the area ahead until you reach the checkpoint inside the room to your right.
There's another challenge waiting for you. You will be crossing a maze down here while enemies are attacking you from high ground in different directions. Just like the trial earlier, getting hit by an arrow will petrify you instantly and reset the progress. The goal here is to step on the red plates found inside. Stepping on top of it will change the height of certain platforms and will let you get to the 2nd level of this area. From the entrance, step on the northwest plate.
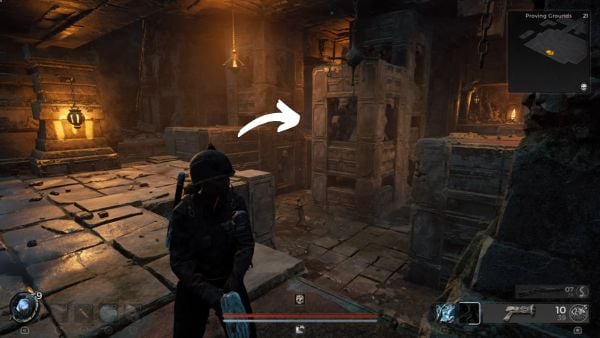
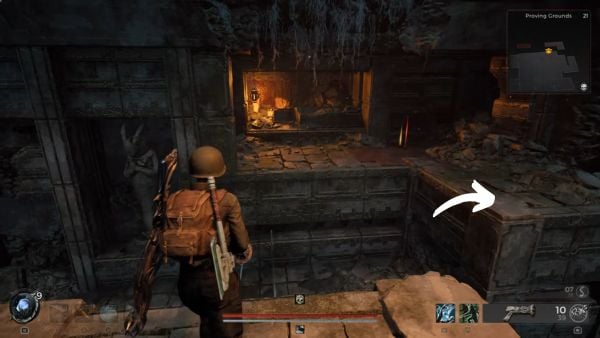
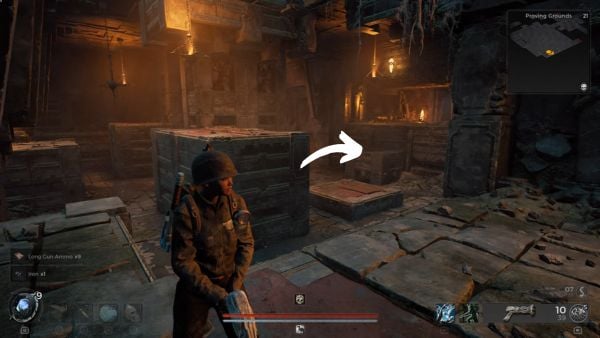
This will lower the stone and will let you step on top of it. Then, walk towards this plate and jump to the left side. Be careful crossing here, because the arrows will still periodically shoot. After that, jump on the platform behind you. This will lower that tower and reveal another plate. Step on top of it, and then jump to the raised platform.
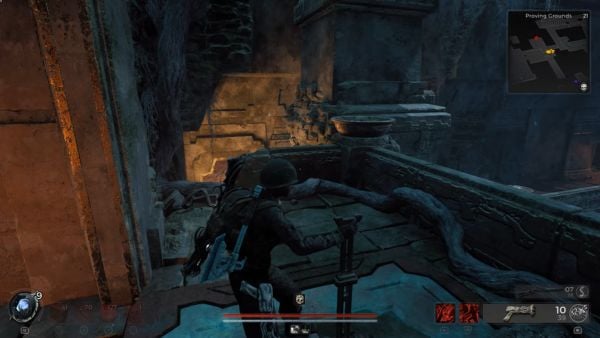
Jump towards the ledge closest to you and step on the plate here. This will lower the plate to give you access to the platform that will let you pull the lever. This lever here will drain the water below you. Exit through the door on your right and back to the checkpoint. Follow this path leading below where you will find a ladder and more of the red plates. Once you reach the end, you will access an area where you must survive a deadly trail of sawblades.
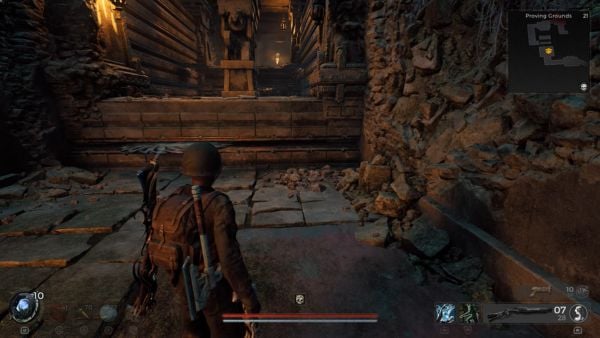
Activate the checkpoint at the end after crossing the sawblades. Then continue the path ahead. The path is straightforward and you will know that you are in the right area as soon as you see the sawblades. After this challenge, you will pull another lever which will drain the water in the area below you. Open the door to your left to reach the area below and pick up the Ceramic Flask at the center.
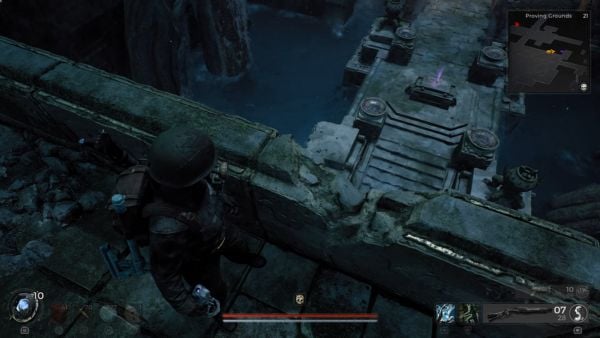
Back to Luminous Vale
Return to Luminous Vale and walk towards the left. You will pass by Walt here and then look for the elevator in the next room to your right. This will give access to The Statue outside after opening the door on your left. Now you can pull the lever in front of The Statue. The hands will move to reveal an entrance to the inner chamber and you can pick up the Cherished Fracture on the altar. Doing this will mark the quests Cursed and The Statue as completed and will start the next quest Return to Lydusa.
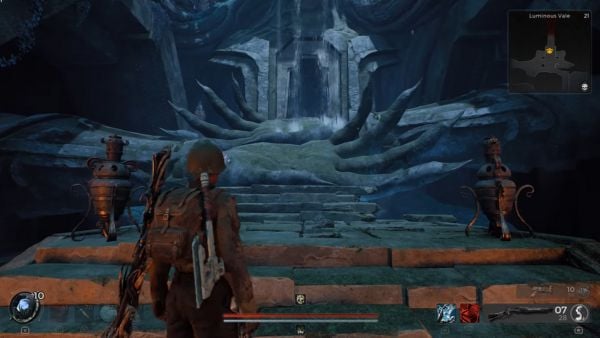
Where to Find Cursed in Remnant 2
Cursed can be found in the following Locations:
Remnant 2 Cursed Rewards
- Rally Band
- Resolute (Trait): During this quest, the players will be cursed by Lydusa which causes stone statues to spawn at the player's death location. Destroying 15 of these stone statues will grant a new trait after.
Cursed Notes & Trivia Remnant 2
- Lore and other trivia go here.
